Printing from an Application
26-พ.ค.-2008
8200138600
สารละลาย
After installing the printer driver, you can now print jobs on the printer.
This section describes the procedure for printing from an application, taking Adobe Reader 8.0 as an example.
NOTE
- For details on the procedures for installing the printer driver, see [Installing the Printer Driver].
- The printing procedure may differ depending on the application you are using.
1. Load paper in the multi-purpose tray or manual feed tray.
NOTE
For details on the procedure for loading paper, see [Loading Paper in the Multi-purpose Tray] or [Loading Paper in the Manual Feed Tray].
2. Open the PDF file to be printed using Adobe Reader.
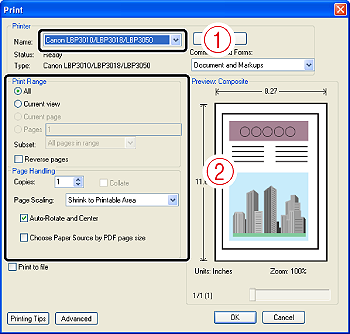
3. Select [Print] from the [File] menu in the application.
4. Select the name of this printer for [Name] or [Printer Name] (1), and then specify the printing preferences (2).
NOTE
The printer name displayed in this dialog box can be changed in the [Printers and Faxes] folder (the [Printers] folder for Windows 2000/Vista).
5. Click [Properties].

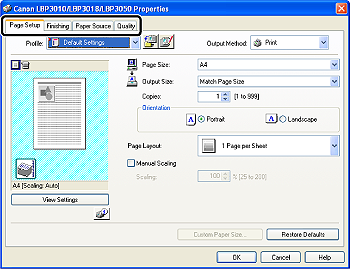
6. Display the [Page Setup] sheet (1), then from [Page Size], select the page size of the document created by an application (2).
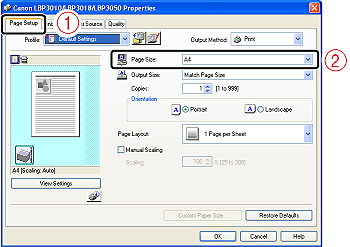
7. Select the size of the loaded paper in [Output Size] as needed.
Leave the setting at [Match Page Size] if the page size specified for [Page Size] and the size of the paper loaded in the paper source are the same, because there is no need to change the setting in this case.

IMPORTANT
The print will be automatically reduced or enlarged to fit on the page when the settings for [Page Size] and [Output Size] are different.
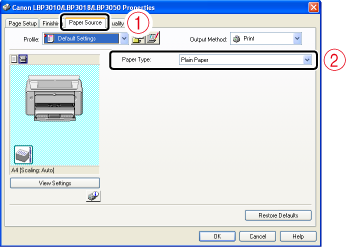
8. Display the [Paper Source] sheet (1), then select the type of the loaded paper in [Paper Type] (2).
NOTE
Specify the setting according to the paper type as follows.
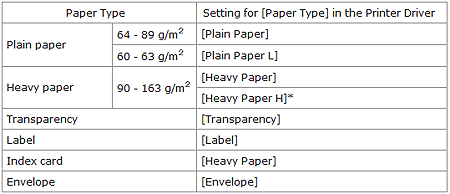
* If you want to improve the fixation when printed with [Heavy Paper] selected, select [Heavy Paper H].
9. Specify the other printing preferences in the [Page Setup], [Finishing], [Paper Source], and [Quality] sheets as needed.
NOTE
For more details on the settings, see Help. For details on displaying Help, see "User's Guide" (HTML manual) in the CD-ROM supplied with the printer.
10. Confirm the settings, then click [OK].
The [Print] dialog box reappears.
NOTE
- It is recommended that you confirm the contents of the [Page Setup] sheet and the [Paper Source] sheet each time you print.
- The settings that are specified here apply only to jobs to be printed from the same application. Exiting the application resets the changed settings to the default settings. For details on the procedure for changing the default values for printing preferences, see [Changing the Default Values for Printing Preferences].
11. Click [OK].
The printer starts printing.
NOTE
- If you have any problems with printing, see "User's Guide" (HTML manual) in the CD-ROM supplied with the printer.
- "User's Guide" (HTML manual) in the CD-ROM supplied with the printer describes how to use the various functions of the printer and printer driver. By specifying the settings for the printer and printer driver for each job, you can make the best use of the printer and its functions.