Where to Check for a Paper Jam (MF4122/MF4150)
10-Nov-2011
8201347200
Solution
When [PAPER JAM] or [PAPER JAM/OPEN REAR COVER] appears on the LCD display, remove jammed paper from the inside of the machine first, then from the paper feeding tray or multi-purpose tray if necessary.
Check the following if you experience repeated paper jams:
- Fan and tap the paper stack on a flat surface before loading it in the machine.
- Check that the paper you are using meets the requirements for use.
- Make sure you have removed any scraps of paper from inside the machine.
CAUTION
a. When removing jammed paper, take care not to cut your hands on the edges of the document or paper.
b. When removing jammed paper or when inspecting the inside of the machine, do not allow necklaces, bracelets, or other metal objects to touch the inside of the machine, as this may result in burns or electrical shock.
c. If you tear the paper, remove any torn pieces to avoid further jams.
d. If loose toner comes into contact with your skin or clothing, wash with cold water. Warm water will set the toner.
NOTE
Do not force a jammed document or paper out of the machine. Contact your local authorized Canon dealer or the Canon help line for assistance if needed.
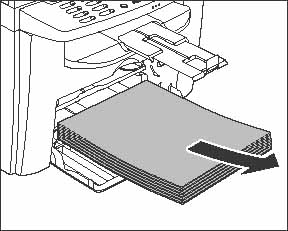
1. Remove the dust cover from the paper feeding tray.

2. Remove the paper in the paper feeding tray.
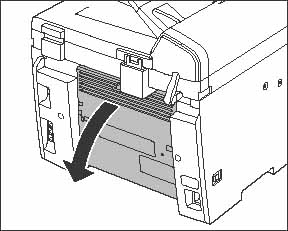
3. Open the rear cover.
This operation is required only when [PAPER JAM/OPEN REAR COVER] appears on the LCD display.
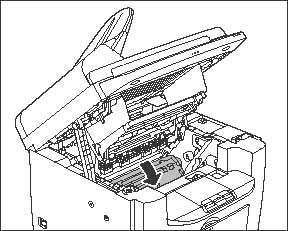
4. Lift the scanning platform (A) until it is locked, and open the printer cover (B).
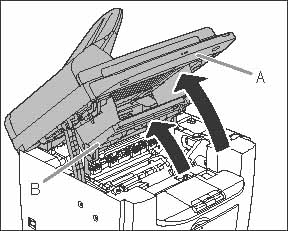
(B): Printer cover
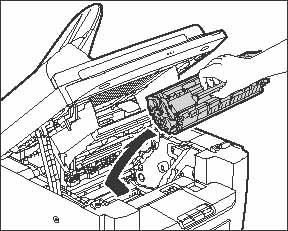
5. Remove the toner cartridge from the machine.
CAUTION
a. Remove watches and any bracelets or rings when touching the inside of the machine. These items might be damaged if they come into contact with the parts inside the machine.
b. To avoid exposing the toner cartridge to light, place it in its protective bag or wrap it in a dry thick cloth.
c. Do not open the drum protective shutter on the toner cartridge. Print quality may deteriorate if the drum surface is exposed to light or is damaged.
NOTE
Always hold the toner cartridge by its handle.
CAUTION
a. Do not touch the fixing assembly (A) as it becomes very hot during use.
b. Do not touch the transfer roller (B) as this can damage the machine.
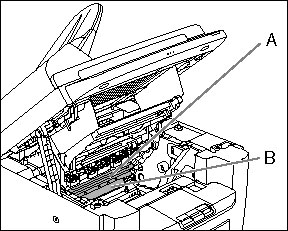
(A): Fixing assembly
(B): Transfer roller
6. Hold both sides of the jammed paper and gently pull it out.
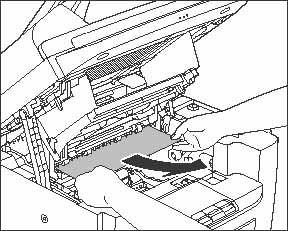
7. Gently pull the jammed paper between the fixing assembly (A) and transfer roller (B) until the leading edge emerges from the machine.
(A): Fixing assembly
(B): Transfer roller
CAUTION
a. Do not touch the fixing assembly (A) as it becomes very hot during use.
b. Do not touch the transfer roller (B) as this can damage the machine.
8. Hold both sides of the jammed paper and carefully pull it out.
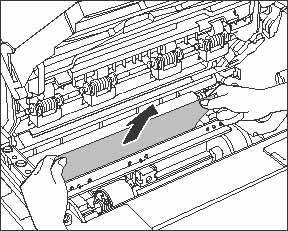
9. Hold both sides of the jammed paper and gently pull it out upward.
This operation is required only when [PAPER JAM/OPEN REAR COVER] appears on the LCD display.
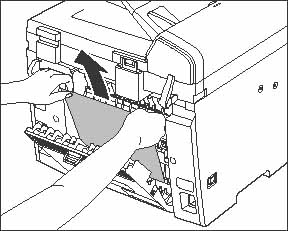
If the jammed paper is badly folded, similar to the folds of an accordion, ease the jammed paper loose and then pull it out from the machine.

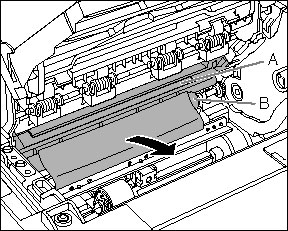
10. Hold both sides of the jammed paper and slowly pull it out in the direction of the arrow.
- When feeding paper from the paper feeding tray:
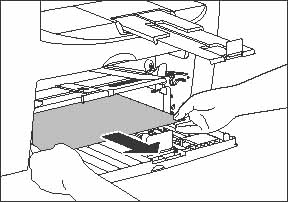
- When feeding paper from the multi-purpose tray:

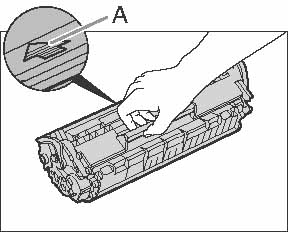
11. Hold the toner cartridge by its handle.
The arrow (A) on the toner cartridge should be facing away from you and pointing down.
CAUTION
Do not open the drum protective shutter on the toner cartridge. Print quality may deteriorate if the drum surface is exposed to light or is damaged.
NOTE
Always hold the toner cartridge by its handle.
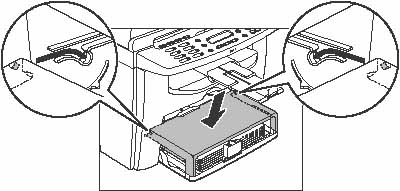
12. Align the protrusion (A) on the right side of the toner cartridge with the bottom edge of the guide (B) inside the machine, then insert the toner cartridge into the machine along the guide.
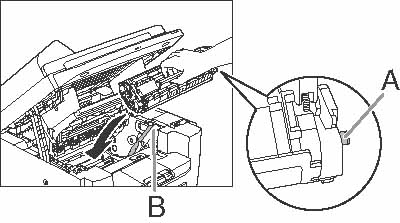
(B): Guide
13. Push down the toner cartridge to make sure it is properly set in the machine.
14. Close the printer cover and lower the scanning platform.
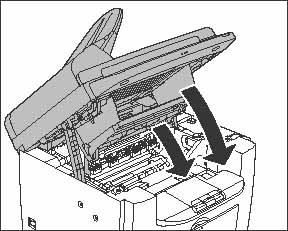
CAUTION
Be careful not to get your fingers caught.
15. Close the rear cover.
This operation is required only when [PAPER JAM/OPEN REAR COVER] appears on the LCD display.
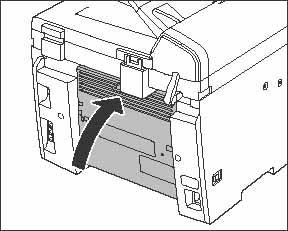
CAUTION
Be careful not to get your fingers caught.
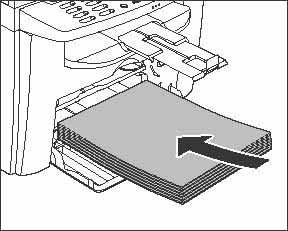
16. Load the paper into the paper feeding tray.
17. Set the dust cover on the paper feeding tray.
NOTE
After all the procedures are completed, the machine should be ready for operating. If the machine returns to the standby mode, troubleshooting has been successful. If the machine does not return to the standby mode, check if jammed paper is still left in the machine.