Replacing the Waste Toner Container
15-Feb-2008
8200035400
Solution
This section describes the procedure for replacing the waste toner container.
Contact your local authorized Canon dealer to obtain replacement waste toner container.
When the waste toner container is filled to capacity, a message appears on the display. Follow the directions in the message.
| Message | When it is Displayed | Contents and Remedies |
 | When the waste toner container needs to be replaced soon | - You can continue to print. - Have ready a new waste toner container. |
 | When the waste toner container is full | - The printer stops printing. - Replace the waste toner container with a new one. |
IMPORTANT
You cannot reinstall a waste toner container for which the message <E1 PRE.WST.T.CTN> or <E1 CHG.WST.T.CTN> has appeared after you remove it from the printer. If you do so, the toner inside the container may spill out. Be sure to replace the waste toner container with a new one.
NOTE
- The waste toner container (Canon Genuine Waste Toner Container) for this printer will be filled to capacity after printing approximately 6,200 pages. The numbers of the pages are estimated when printing in the following conditions.
Paper size: A4; Paper type: Plain paper; Printing ratio: 5 %; Print density: the default; 2-sheet intermittent/1-sided Printing
- Depending on the printing preferences or printing environment such as the intermit printing, paper type, paper size, and 1-sided / 2-sided printing, the number of pages you can print may be half the number.
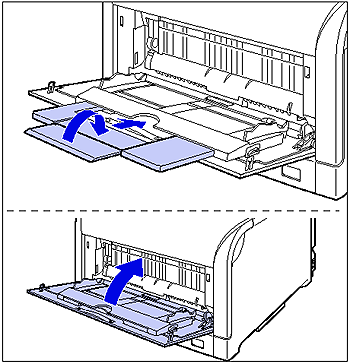
1. If you are using the multi-purpose tray, close it.
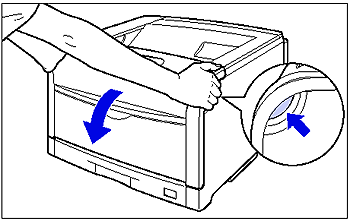
2. Open the front cover.
While pressing the lever on the right side of the front cover, open the front cover toward you.
IMPORTANT
Before opening the front cover, make sure that the multi-purpose tray and the paper cassette of the printer are closed.
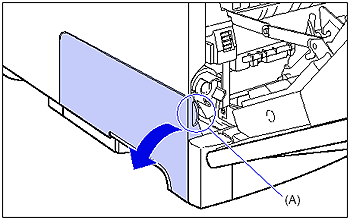
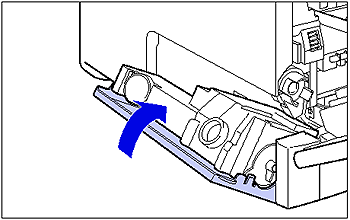
3. Open the waste toner cover while holding it by the tab (A).
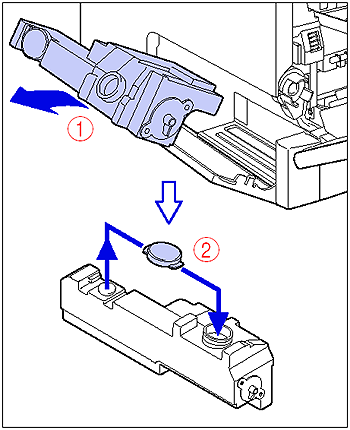
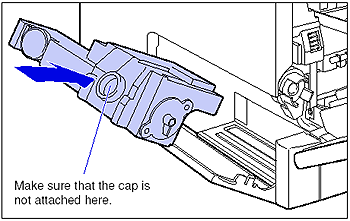
4. Remove the used waste toner container (1), then attach the supplied cap (2).
5. Take the new waste toner container out of the protective bag.

6. Install the waste toner container in the printer.
7. Close the waste toner cover.
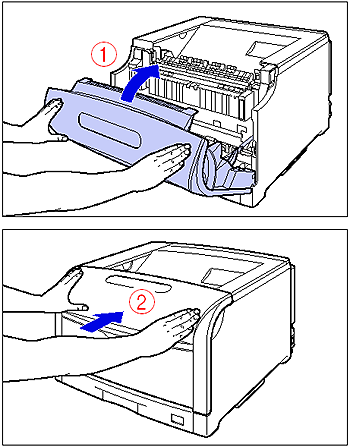
8. Close the front cover.
While supporting the front cover (1), push and close the front cover with both hands as shown in the figure (2).
IMPORTANT
- Be sure to use the waste toner container designed for this printer.
- You cannot reinstall a waste toner container for which the message <E1 PRE.WST.T.CTN> or <E1 CHG.WST.T.CTN> has appeared after you remove it from the printer. If you do so, the toner inside the container may spill out. Be sure to replace the waste toner container with a new one.
- Waste toner cannot be reused. Do not mix the waste toner with new one.
NOTE
The packing materials may be changed in form or position to be placed, or may be added or removed without notice.